The VDR (Virtual Data Room) lets you control precisely which clients can access documents within an opportunity. Using custom folders and root-level file uploads, you can release content to individual clients or groups of investor accounts — and optionally require them to sign a document, such as an NDA, before access is granted.
The Documents Tab
Open an opportunity and click the Documents tab. The document library is divided into folders. Some are system folders created automatically by the platform; others are custom folders created by your team.
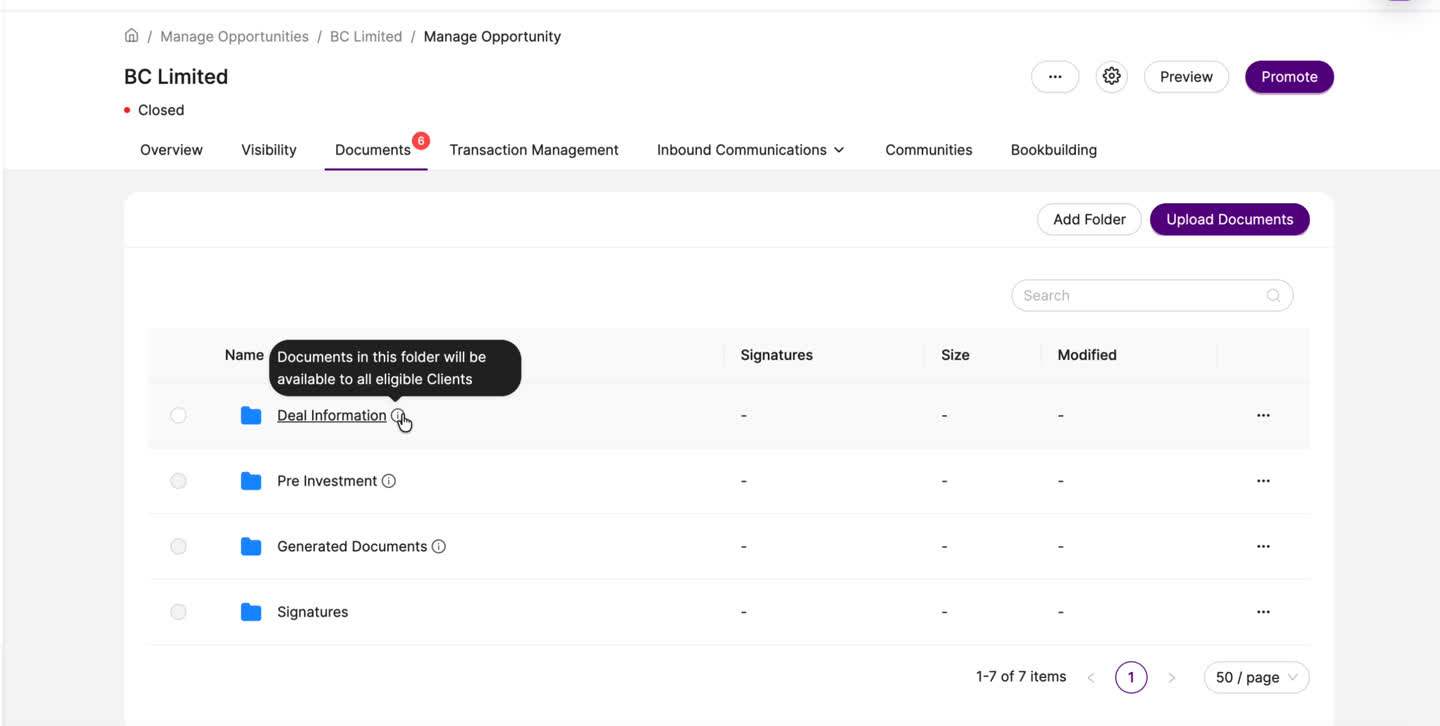
System Folders vs Custom Folders
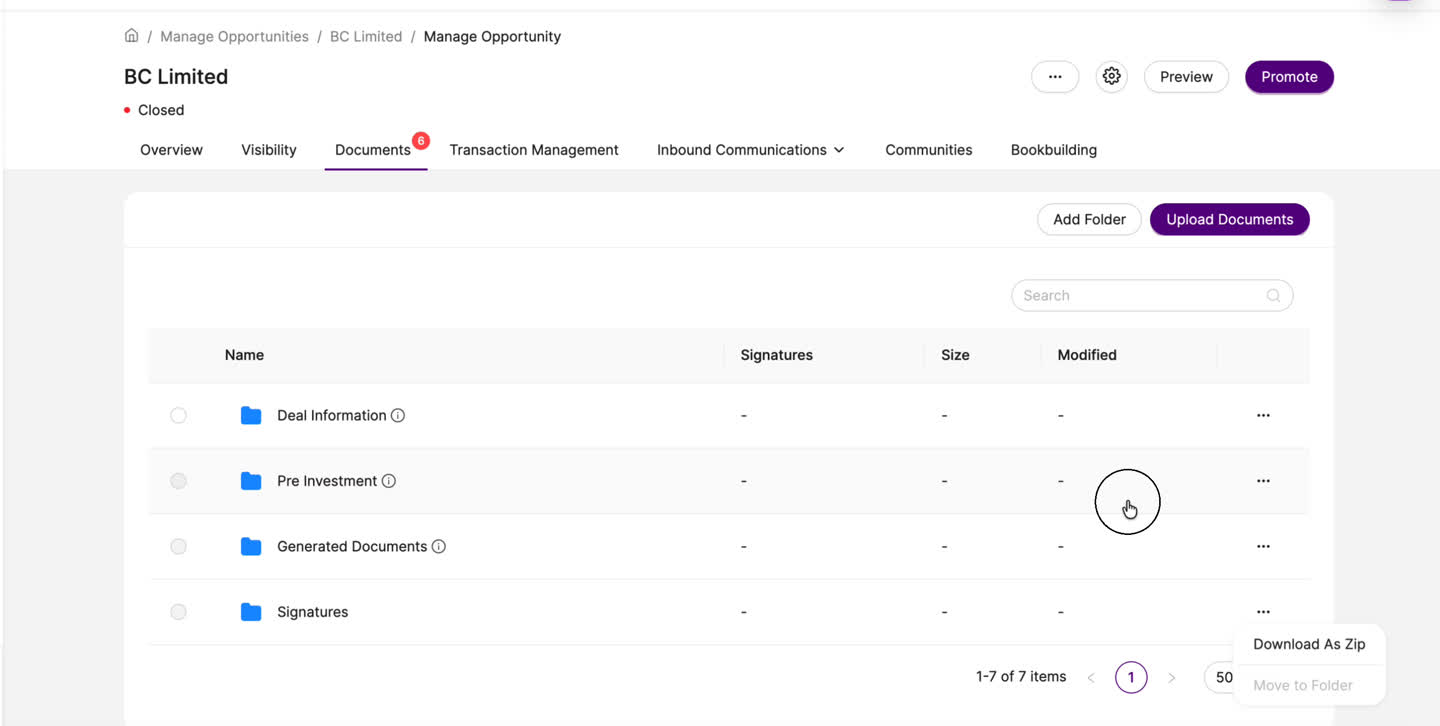
The ⋯ menu on the right of any folder row shows what actions are available, and this is where system and custom folders differ.
System folders offer only Download As Zip and Move to Folder. Their visibility is fixed by the platform and cannot be changed.
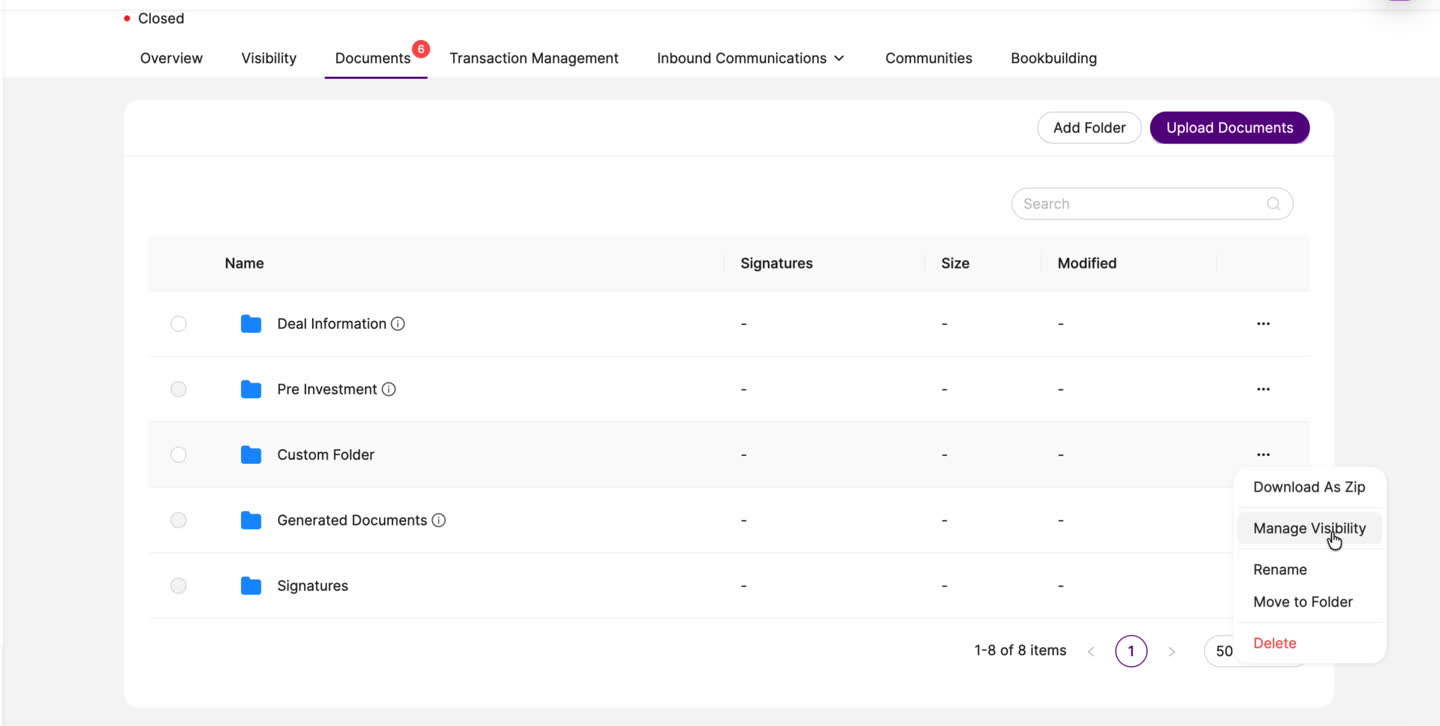
Custom folders include Manage Visibility in their ⋯ menu, giving you full control over which clients can see the folder and everything inside it. All documents placed inside a custom folder will be visible to exactly the clients defined in that folder's visibility settings.
Adding a Custom Folder
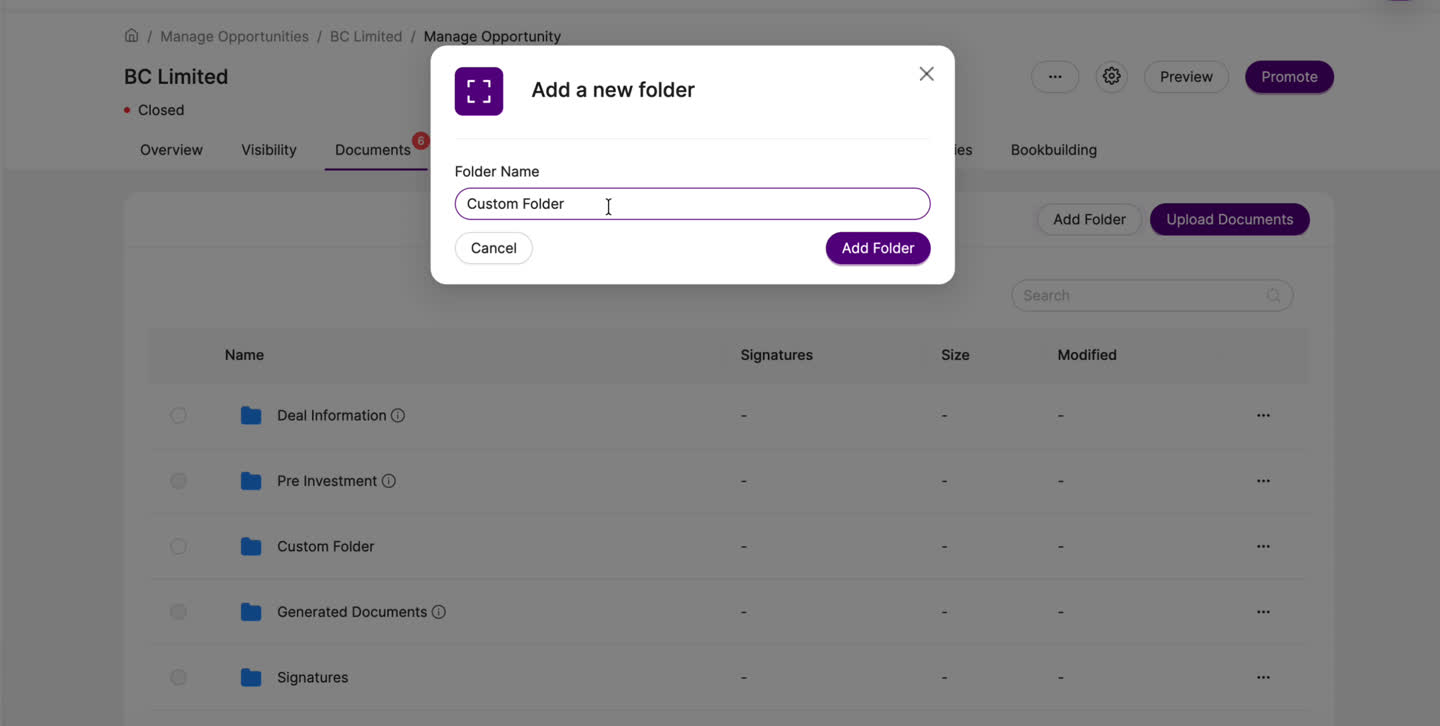
- Click Add Folder in the top-right of the Documents tab.
- Enter a name in the Folder Name field.
- Click Add Folder to confirm.
Uploading Documents
Click Upload Documents in the top-right corner and select the files you want to add. Files are virus-scanned automatically on upload.
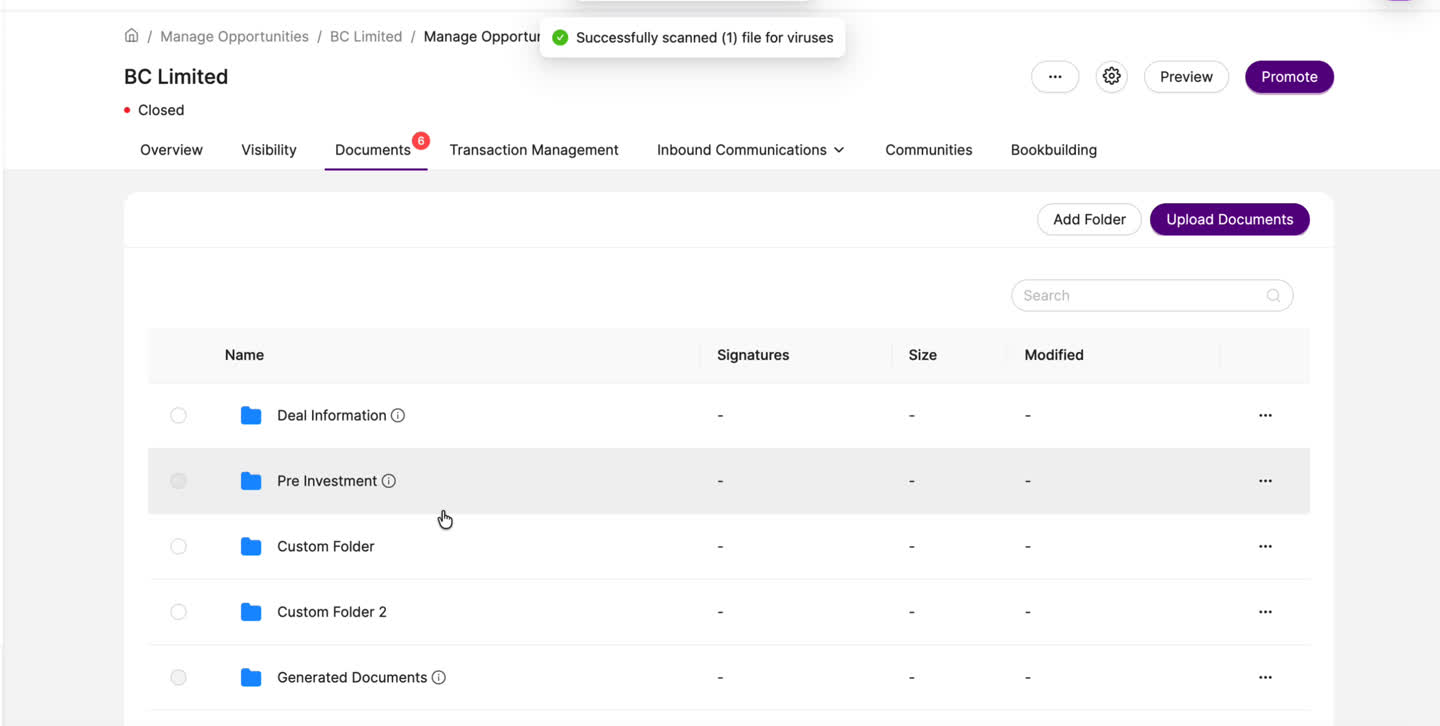
Where you upload a file determines how its visibility works:
- Root level — the file sits directly in the VDR, not inside any folder. It has its own Manage Visibility controls and can be released to individual clients or groups independently.
- Inside a custom folder — the file inherits the folder's visibility settings. All clients granted access to the folder can see every document inside it. Files within a folder cannot have their visibility managed individually.
Managing Visibility
The Manage Visibility panel works the same way for both custom folders and root-level files. To open it, click the ⋯ menu on the folder or file row and select Manage Visibility.
The panel shows the current visibility setting. When set to Private, only clients you explicitly select can see the content.
Step 1 — Select clients
Click the Share With tab. Search for or scroll to the clients you want to grant access to and select their checkboxes, then click Set up Visibility.
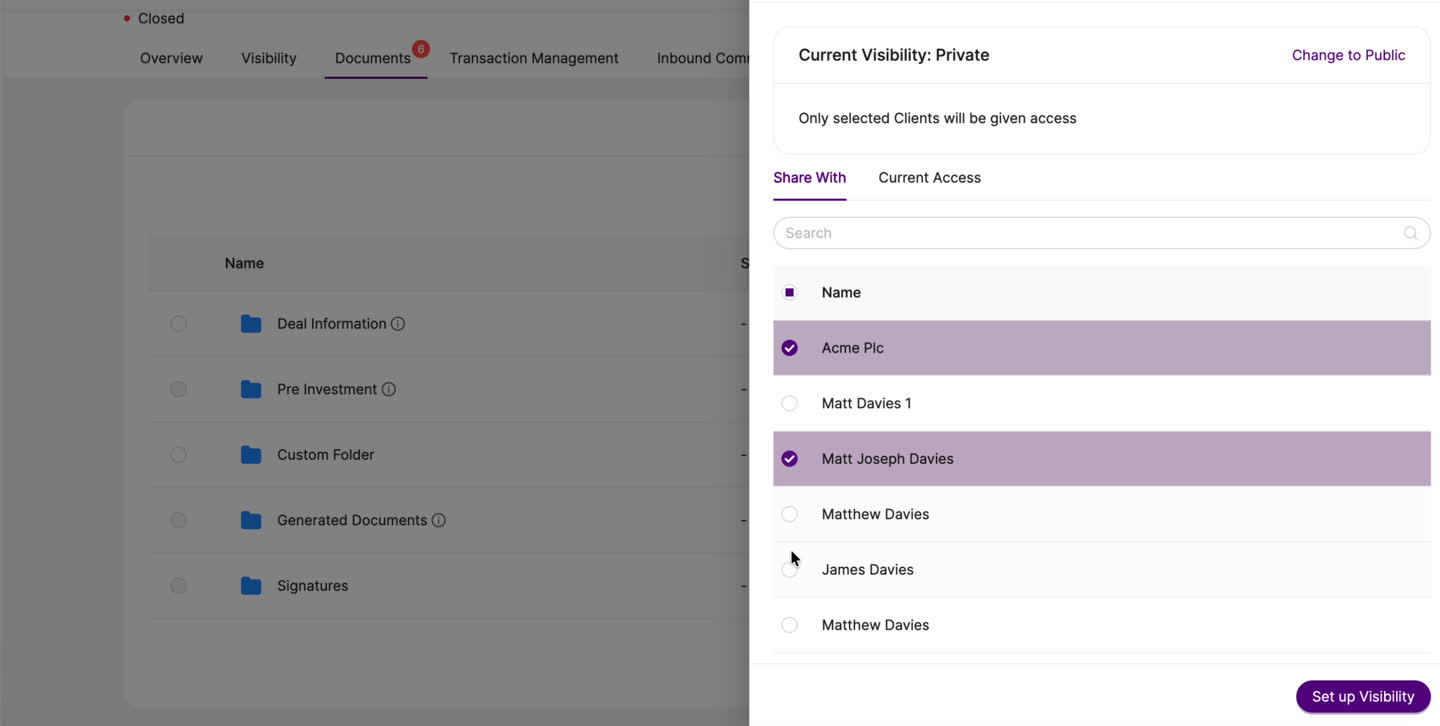
Step 2 — Set conditional visibility (optional)
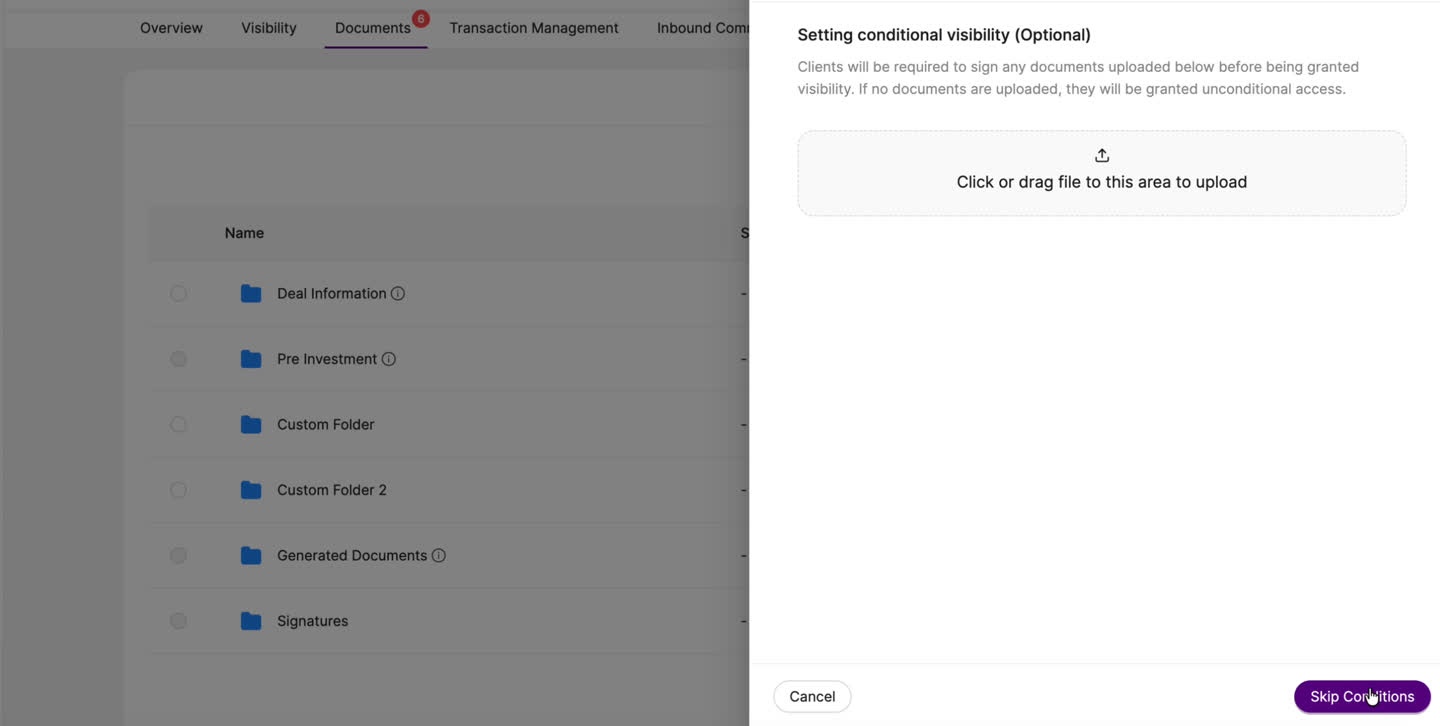
Before confirming, you are presented with a Setting conditional visibility screen. This lets you upload a document — such as an NDA — that the selected clients must sign before they are granted access to the content. Upload the document to the drop zone, or click Skip Conditions to grant access without any prerequisite.
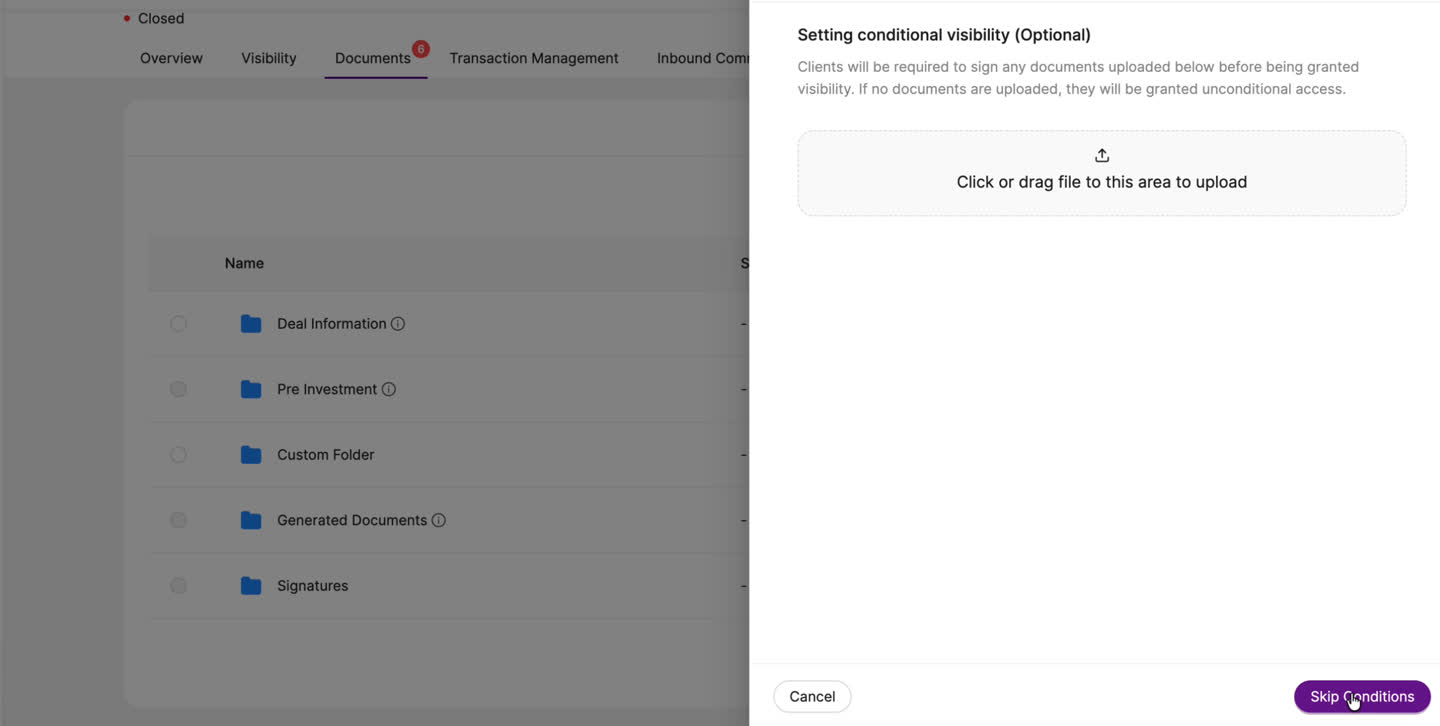
Step 3 — Confirm
A summary screen lists the clients who will be granted access. Review and click Confirm to apply.
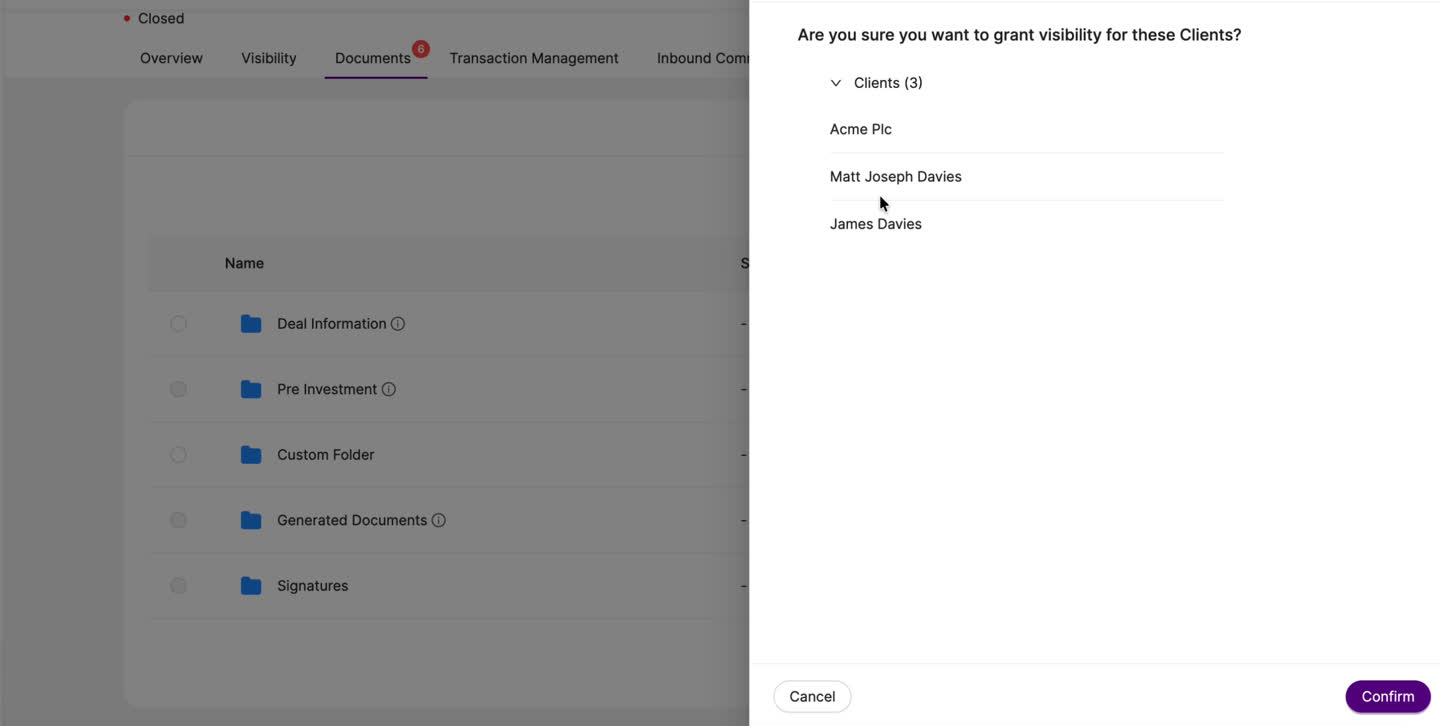
Once confirmed, the Current Access tab updates to show each client with a Granted status. To revoke all access at any time, click Remove Visibility at the bottom of the panel.
Was this article helpful?
That’s Great!
Thank you for your feedback
Sorry! We couldn't be helpful
Thank you for your feedback
Feedback sent
We appreciate your effort and will try to fix the article